


October is hands down my favorite month of the year. It’s right before all the madness of the holiday season begins (if you work in retail management you feel my pain), my birthday is at the end of the month (the 27th to be exact in case you want to know when you should send me my gift) and most importantly Halloween is almost here!
October is the perfect time to experiment with weird looks that I would feel awkward creating in the middle of June. Like hey, what’s up, I’m just going to roll into work with a fake flesh wound on my cheek, nbd.
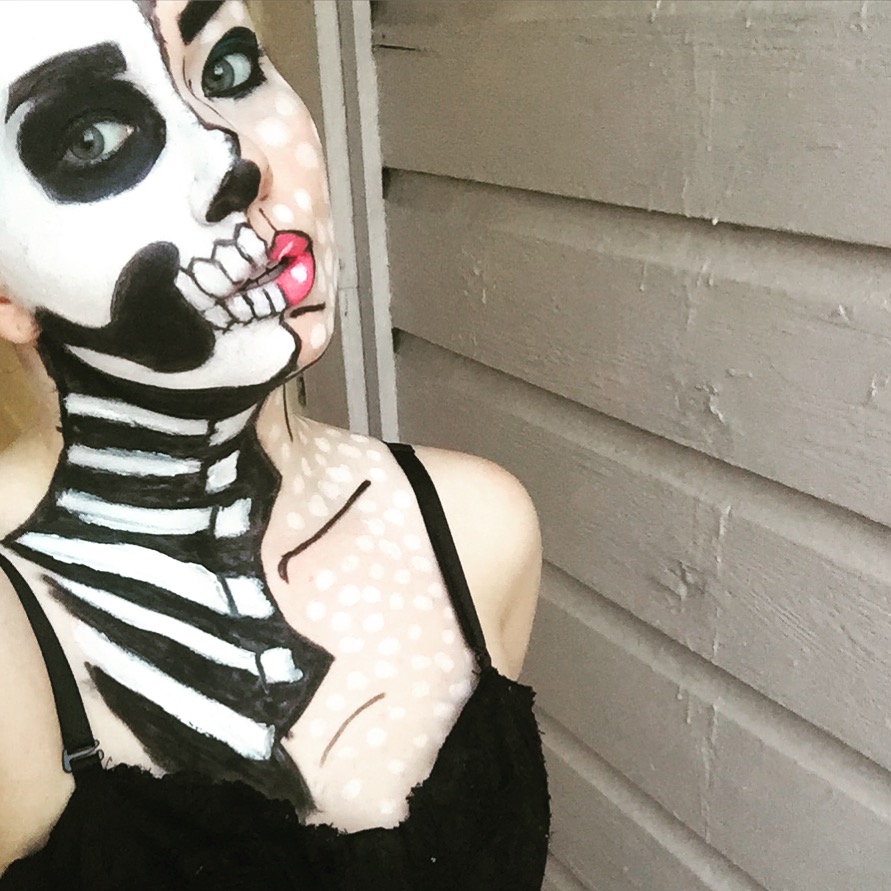
But in October anything is fair game and to get this month started right I decided to create this fun (and easy) pop art skeleton! I’ve seen some pretty amazing creations on youtube (my favorite is Nicole Guerriero’s pop art zombie) and pinterest so I’ve linked them below so you can see where I got my inspiration from. I used them all to get an idea of what I wanted to do and then just winged it as I went along.
It looks really complicated but it actually was pretty easy to achieve, so let’s get started!
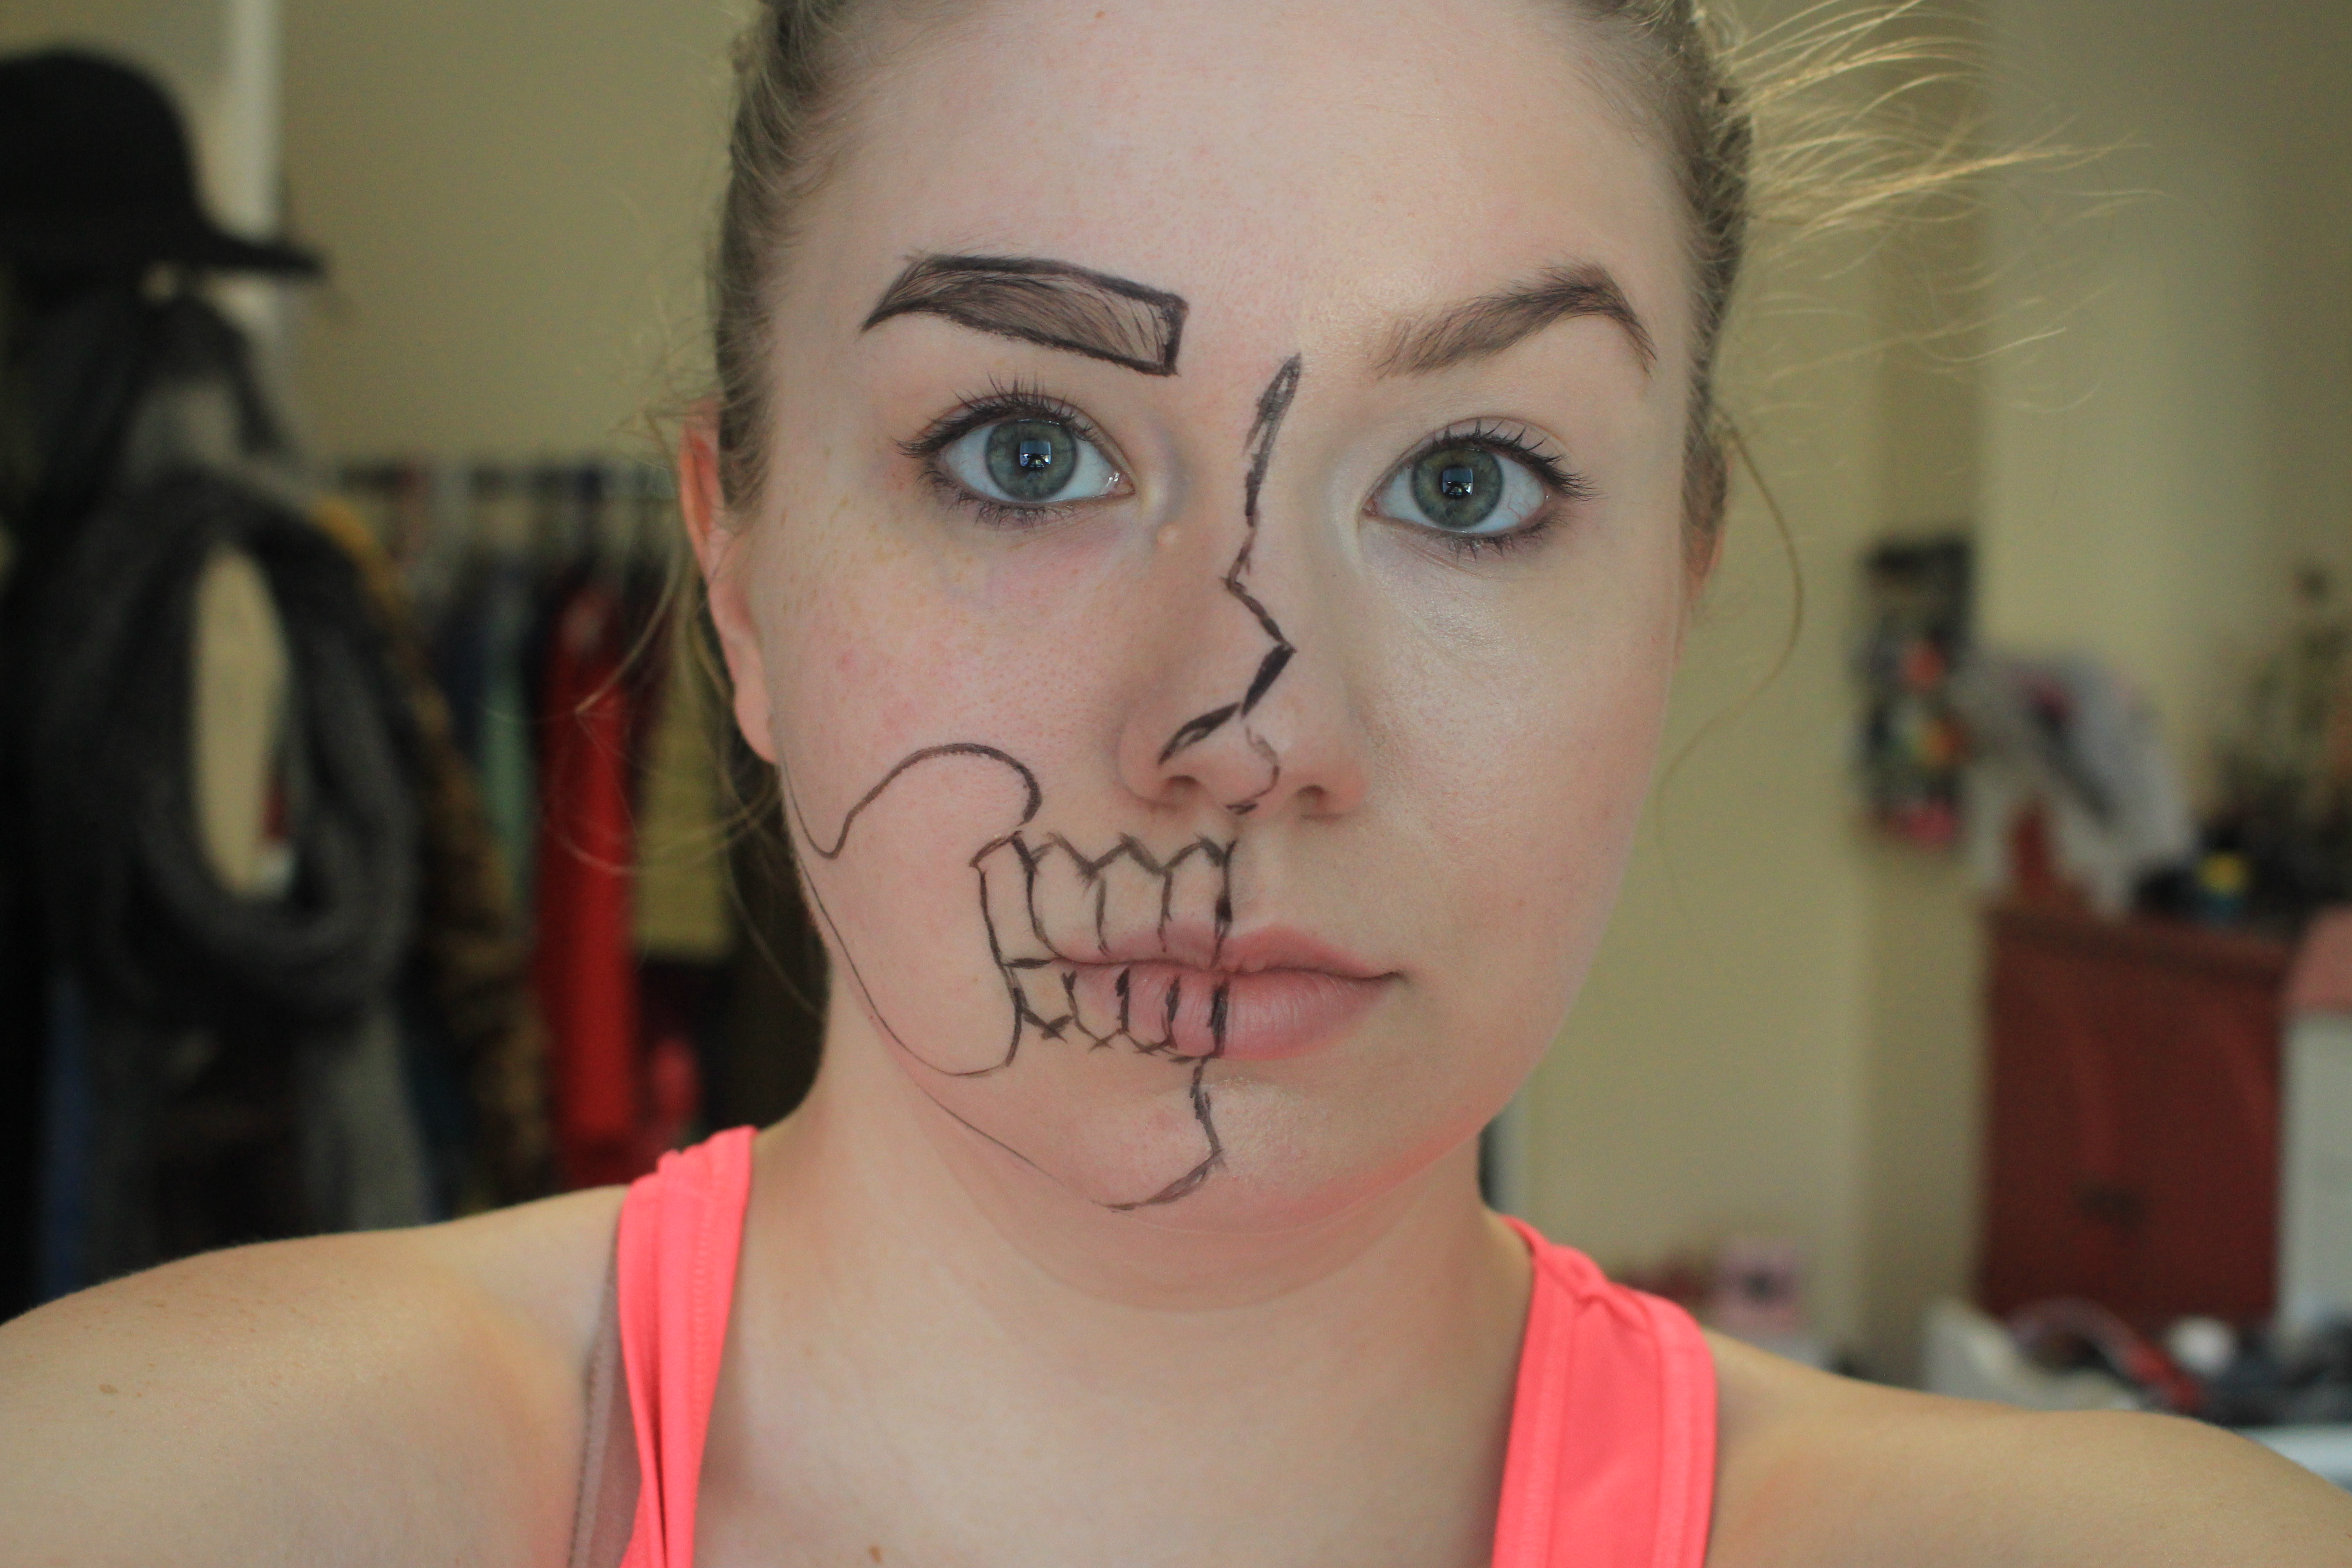
I started out by taking a liquid liner (later on I opted for a pencil liner which gave me more control and was easier to use) and lining my face. I did the skeleton side first. I outlined my brows, teeth and the hallow parts of the skull. I just referenced skull makeup pictures as I went along and made it my own. The point of pop art is that it looks drawn on, like a comic book, so I wasn’t too concerned about the accuracy of the skeleton. Feel free to be as sloppy as you like with the lines because you can always clean them up later by blending or using the white face paint to cover them up.


I filled in the hallow parts of the skeleton (nose, cheek bone, eye socket, etc.) with a thicker pencil liner and then went over it with black eye shadow. If I could redo it I might have just covered my eyebrow as it looks a little silly for a skeleton to have one but the whole look is kind of silly so I didn’t mind it. I filled in the rest of my face with several layers of white face paint. I used a brush and my fingers, using patting motions so I wouldn’t have brush strokes visible on my face. No big deal if the white paint covers any of your line work, just wait for it to dry and go back over it with the black liner. I began lining the other half of my face as well. I kept my face makeup on from earlier in the day so regular foundation is fine. I outlined my lips, highlighted some creases on my face, and later on added a line to my cheek bone to show my contour as well as outlining my face entirely. Anything to make it look more like a drawing. I also outlined and filled in my other eyebrow.

There are a ton of options for the eye makeup so do whatever you like. I wanted to stick with the drawn on, dramatic look so I drew chunky bottom lashes on and outlined a cat eye. I filled it in using Gonzo from the Ubran Decay Electric palette. Then I used the Lime Crime lipstick in Geradium for my lips and used white liner to add highlights. I used the same white pencil liner to create the white dots on my face and body. If I could redo it I would have made them smaller and more precise.

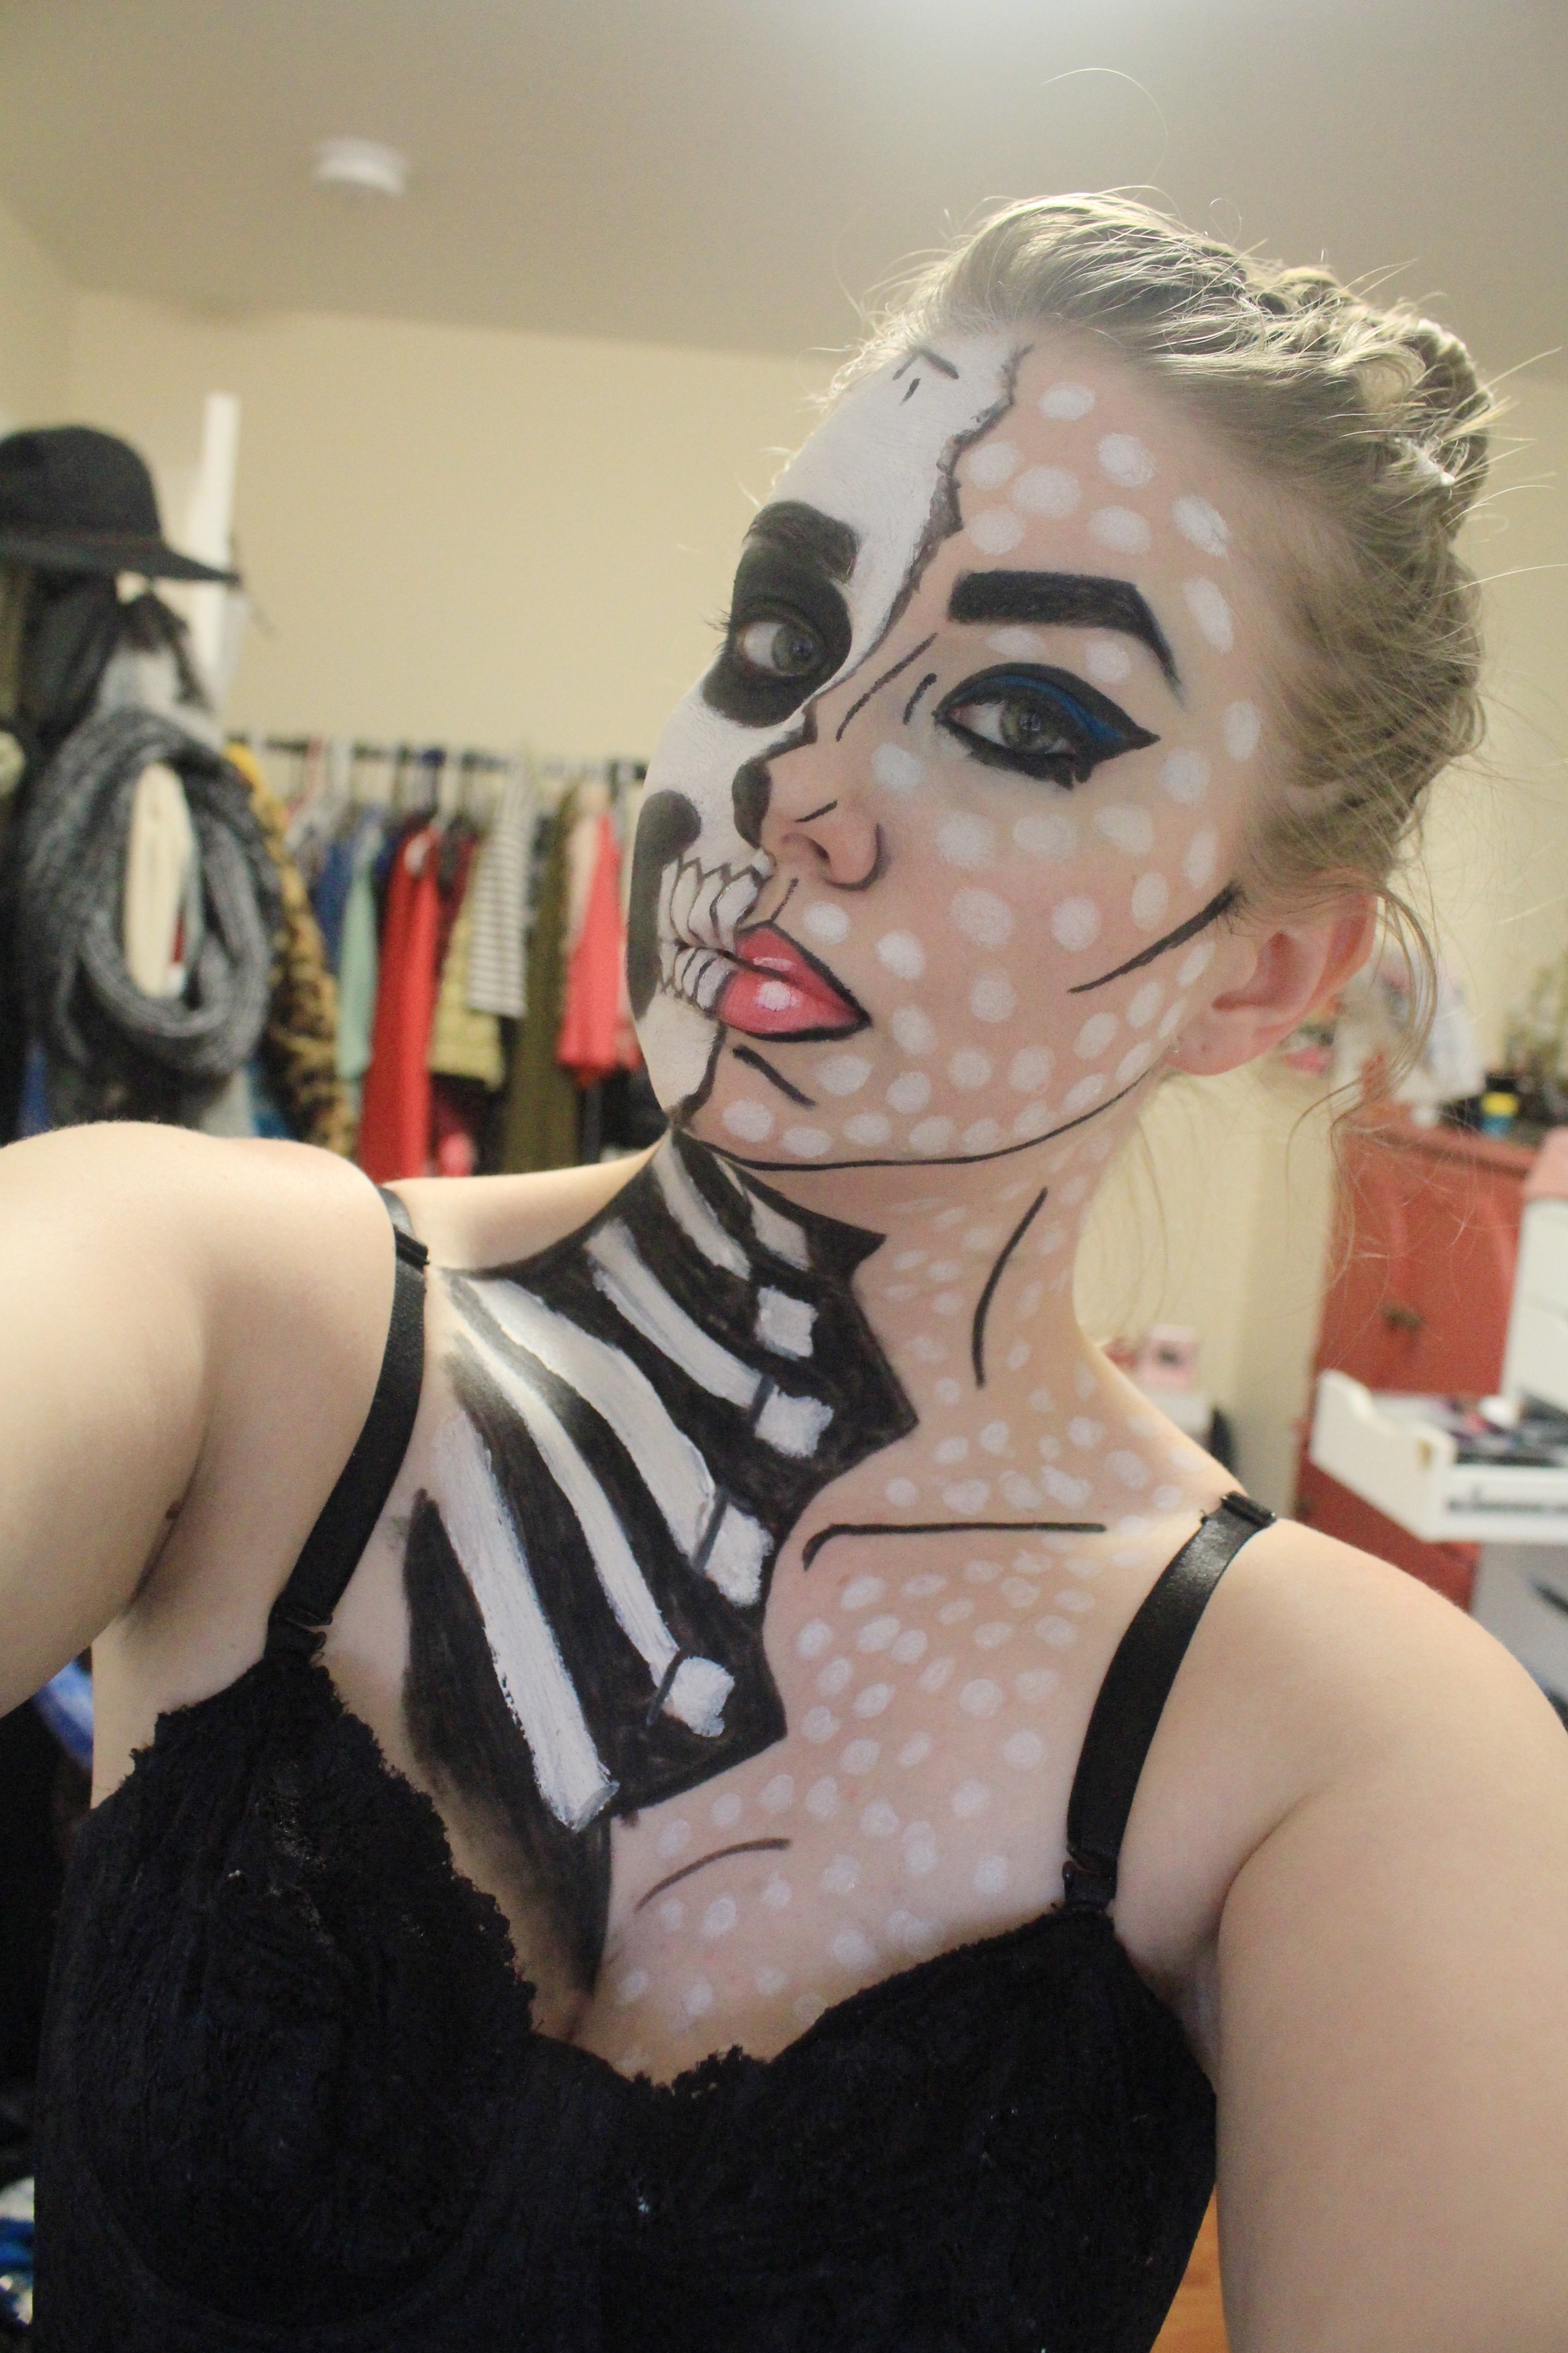
I outlined the bones on my neck and chest with the black liner and filled in the hall own areas first. Then I went over the bone areas with the white face paint and cleaned it up with the black liner after. Just drew little boxes down my neck and chest and then parallel lines for the other bones. The other half is very simple with just a few lines highlighting the contours of the body.
There are certainly a few things I’ll tweak if I create this look again but for my first time attempting it I’m really happy with it! It took me about an hour to create but could take more or less time depending on how intricate you want to get.
Happy haunting!
Xoxo,
She
Inspiration: